
AirDrop changes how we share files for the better. It moves over 4 billion files each day. This makes it super easy for those with Apple devices to send media and documents quickly. This guide will teach you everything about AirDrop. You’ll learn how to use it on different Apple devices, solve common problems, and ensure smooth file sharing.
Understanding AirDrop: The Basics of Apple’s Wireless Sharing
This part will teach you all about AirDrop. It’s a feature on Apple devices that allows wireless sharing. You’ll learn how it works and its key benefits. We will also look at the devices that support AirDrop and make sure your software is up to date.
What is AirDrop and How Does It Work?
AirDrop lets Apple users share photos, videos, and files easily. It’s quick with no cables needed. This feature uses Bluetooth and Wi-Fi to make a link between devices. Then, you can send files to other Apple devices with just a tap.
Supported Devices and Software Requirements
You can use AirDrop on iPhones, iPads, and Mac computers. Your device needs iOS 7 or later for iPhones and iPads. For Macs, you need macOS X Yosemite or a newer version. It’s key to check if your device and software support AirDrop before using it.
The Technology Behind AirDrop: Bluetooth and Wi-Fi
AirDrop uses Bluetooth to find nearby devices. Then, it uses Wi-Fi Direct for quick and secure file transfers. This technology mix makes sharing on AirDrop fast and reliable.
AirDrop Settings: Customizing Your Sharing Preferences
Customizing AirDrop lets you pick who can send you files. It helps make your AirDrop work better for you. You can also decide who sees your device. This means you can set it just the way you like.
Here’s how to get to your AirDrop settings:
- Open the Settings app on your iPhone or Mac.
- Scroll down and tap on General.
- Tap on AirDrop.
Once you’re in the AirDrop menu, you can set up who can share with you. Here are your options:
- Receiving Off: Choose this to turn off file sharing. You won’t get files from anyone this way.
- Contacts Only: Pick this to share files only with people in your contacts. They need to be in your contacts to see you.
- Everyone: Use this if you want to share with anyone nearby. Make sure you only do this in safe places.
Setting up your AirDrop just right means you’re safe from unwanted files. It also makes sharing files without wires smoother and safer.
Keep in mind that you should tweak settings based on your needs. With a few clicks, you can make sharing files with AirDrop a breeze.
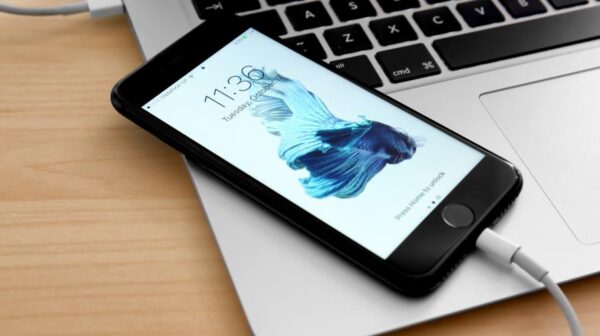
How to AirDrop to and from Mac Computers?
In this guide, we’ll show you how to AirDrop between iPhones and Macs. AirDrop lets you easily share files, like important docs or fun photos. This tool makes sending files from iPhone to Mac, and the other way around, simple.
Enabling AirDrop on Your Mac
To enable AirDrop on your Mac, here’s what you do:
- Open Finder on your Mac.
- Click on “Go” in the top menu.
- Select “AirDrop” from the drop-down menu.
- Your Mac is now ready to connect with other Apple devices nearby.
Sharing Files to a Mac Using AirDrop
After turning on AirDrop, sharing from your iPhone is easy:
- Open the file or content you wish to share on your iPhone.
- Tap the share icon, often an arrow pointing up.
- Choose the AirDrop option from the sharing choices.
- Your Mac will show up as an option. Select it.
- The file will transfer to your Mac without a cable.
Receiving Files from iPhone or iPad on Mac
Receiving on your Mac is just as straightforward:
- Ensure AirDrop is on your Mac.
- On your iPhone or iPad, open the file or content to share.
- Tap the share icon and pick AirDrop.
- Your Mac will be available as a destination.
- Choose your Mac, and the file will move over the air.
Whether it’s sharing important documents or fun photos, AirDrop is quick and smooth. Just follow these steps to enjoy AirDrop between your iPhone and your Mac.
How to AirDrop: Step-by-Step Process Explained
In this part, we’ll show you how to use AirDrop step-by-step. We’ll guide you through sending and receiving files using AirDrop and provide issues and tips for making it work well.
Selecting and Sending Files via AirDrop
Sharing files with AirDrop is easy. Just do these steps on your Apple device:
1. Start with the file you want to share. It could be anything like a photo, video, or document.
2. Hit the share button; it looks like a square with an arrow up. This opens your sharing options.
3. Find AirDrop in the menu, pictured with circles. Click on it.
4. Your device will search for others with AirDrop nearby. When they show up, pick who to send it to.
5. Choose the person you want to share with by tapping their icon. You can pick many people at once.
6. Finally, press “Send.” The other person gets a message to accept or decline your file.
Accepting and Declining AirDrop Transfers
Getting a file over AirDrop? Here’s how to say yes or no:
1. You’ll see who’s sending the file and a part of what they’re sharing. It also tells you the file’s size and type.
2. Click “Accept” to get the file. It will then save on your device.
3. Hit “Decline” if you don’t want it. The sender will know you said no.
Troubleshooting Common AirDrop Issues
Running into AirDrop problems? Try these fixes:
1. Check AirDrop is on for both devices. Go to Control Center (iOS) or Finder (Mac) to do this.
2. Keep your devices close with Bluetooth and Wi-Fi on.
3. Restart your phone to fix small issues and get AirDrop working again.
4. No luck yet? Try resetting network settings. This is in the Settings app (iOS) or System Preferences (Mac).
5. Update your software too. Apple often sends out updates that help AirDrop work better.
Best Practices and Tips for Seamless AirDrop Sharing
AirDrop is great for wirelessly sharing files. Here are some tips to make your sharing experience better:
1. Enable Bluetooth and Wi-Fi
Make sure Bluetooth and Wi-Fi are on your Apple device. They help AirDrop connect to other devices easily.
2. Keep Devices in Close Proximity
To use AirDrop well, keep devices close together. This makes your connections strong and quick and reliable for file transfers.
3. Adjust AirDrop Visibility Settings
AirDrop is normally set to “Contacts Only.” But you can change it to “Everyone” for wider sharing. Access these options in your Control Center.
4. Organize Your Files
Keep your files neat and tidy. This makes it faster to find and share files. It saves you time.
5. Rename Your Device
If you have many Apple devices, give them unique names. This way, you know which one you’re sharing with. It avoids mix-ups.
Follow these steps to enjoy AirDrop more. It makes file sharing on Apple devices a breeze.
We’ve gone through everything about AirDrop for sharing files on Apple devices. It’s great for sending photos, videos, and files between your iPhone and Mac fast. Just follow our steps and use the best practices to make sharing easier and more productive.
AirDrop lets you quickly share documents at work, photos with family, or work on projects with friends. It means you don’t need cables or any extra devices to share files smoothly.
Make sure to set your AirDrop options for safe and personal sharing. You can pick who sends you files or who sees your device. This way, AirDrop can meet your sharing needs better.
In the end, AirDrop is an awesome tool for sharing files across your Apple gadgets. Use it to save time, work better with others, and have a smoother time with digital sharing.k
FAQs
How do I enable AirDrop on my iPhone?
To start AirDrop on your iPhone, open the Control Center. You can do this by swiping up from the screen’s bottom. Once there, tap the AirDrop icon. Then, choose to share with “Contacts Only” or “Everyone.” This lets you control who sees your device and can send you files over AirDrop.
Can I AirDrop photos and videos from my iPhone to a non-Apple device?
No, AirDrop works only between Apple devices. It supports iPhones, iPads, and Macs with iOS 7 or later, and Macs with OS X Yosemite or later.
How can I troubleshoot AirDrop if it’s not working?
If AirDrop isn’t working, check if both devices have Bluetooth and Wi-Fi on. They should also be close. Make sure they run on software versions that are compatible. Try turning AirDrop on and off again, and restart both devices to fix the issue.
Can I customize my AirDrop settings?
Yes, you can decide who can send you files via AirDrop. Go to the Control Center. Then, press the AirDrop icon for options like “Receiving Off,” “Contacts Only,” or “Everyone.” This gives you control over who can see your device.
How do I transfer files between my iPhone and Mac using AirDrop?
For file transfers between your iPhone and Mac, first, ensure they have compatible software. Make sure AirDrop is on. Share the file from your iPhone. Select your Mac from the list. Accept the file on your Mac when prompted to start transfer.
How do I select and send files via AirDrop?
Choose the file you want to share and open it. Click the Share button. Then, pick the device from the AirDrop list. Finally, hit “Send.” The recipient will get a notification. They can choose to accept or decline the file.
What are some best practices for using AirDrop efficiently?
To make the best of AirDrop, enable it on both devices and connect them to the same network. Keep devices close for a good connection. Always accept AirDrop transfers from people you trust to stay safe.
How fast is the transfer speed on AirDrop?
AirDrop’s speed varies based on the file size and network conditions. In perfect settings, it can reach up to 10 Mbps.